Webhook Notifications
Webhook Notifications deliver real-time HTTP POST callbacks to your server when payment events occur on the TNS Payment Orchestration platform. Instead of polling for transaction status, your system receives instant notification when a payment is approved or declined.
The below steps will help you to get started with setting up Webhooks
1
Ensure you have an API Key with Webhook Access
Your merchant account must have an API key with permission to "Webhook Notifications". If you are receiving a permission error, please contact TNS.
- API Keys can be found in the Account Management > API Keys section of the TNS Payment Orchestration Portal
- Click on “Test"
2
Configure a Webhook Endpoint
In the Merchant Portal, navigate to your merchant account and select the “Webhooks” tab. You can configure up to 5 active webhook endpoints per merchant.
- Click Add Endpoint and provide the following information:
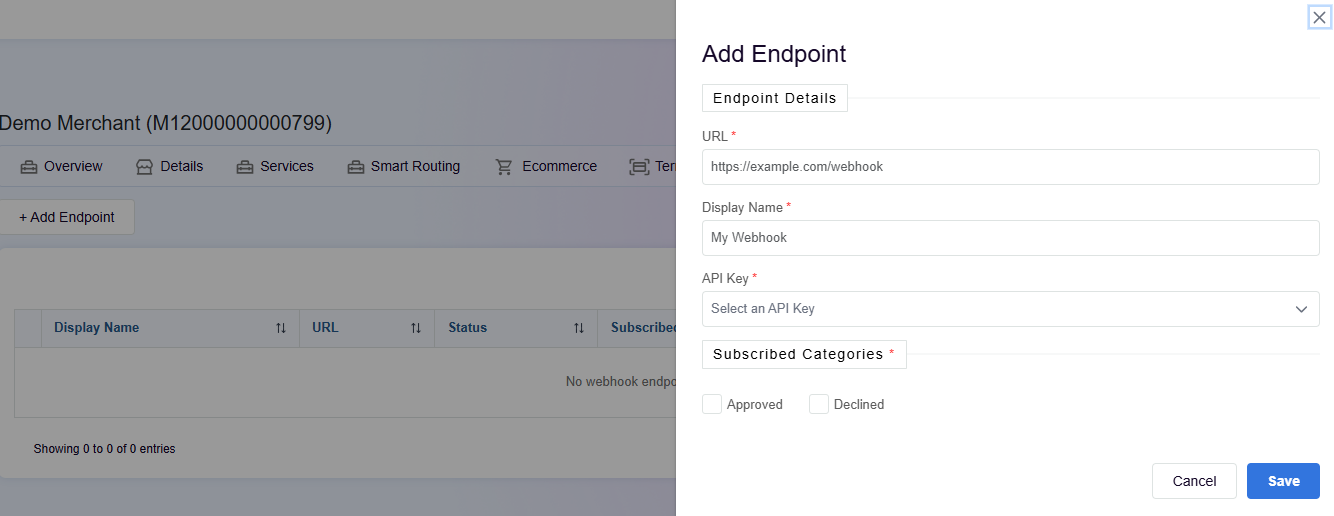
Title
Description
Field
Description
URL
Your HTTPS endpoint that will receive notifications. Must use
Display Name
A friendly name for this endpoint (e.g. "Production Order Processor"). This allows you to recognise why the webhook event was created.
API Key
Select one of your API keys with webhook access. This key is used to sign deliveries.
Event Categories
Choose which events to receive: approved, declined, or both.
3
Implement Your Endpoint
Your endpoint must:
- Accept HTTP POST requests with a JSON body
- Respond with an HTTP 2xx status code within 15 seconds to acknowledge receipt
- Be accessible via HTTPS (HTTP URLs are rejected)
4
Test Connectivity & Receive a Test Notification
After saving your webhook, you can perform a connectivity and sample webhook test.
- Identify the webhook you want to test
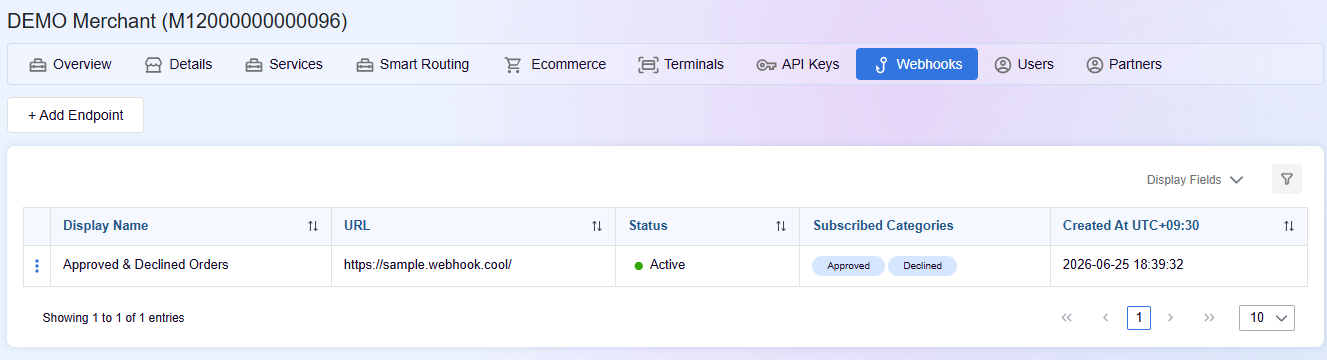
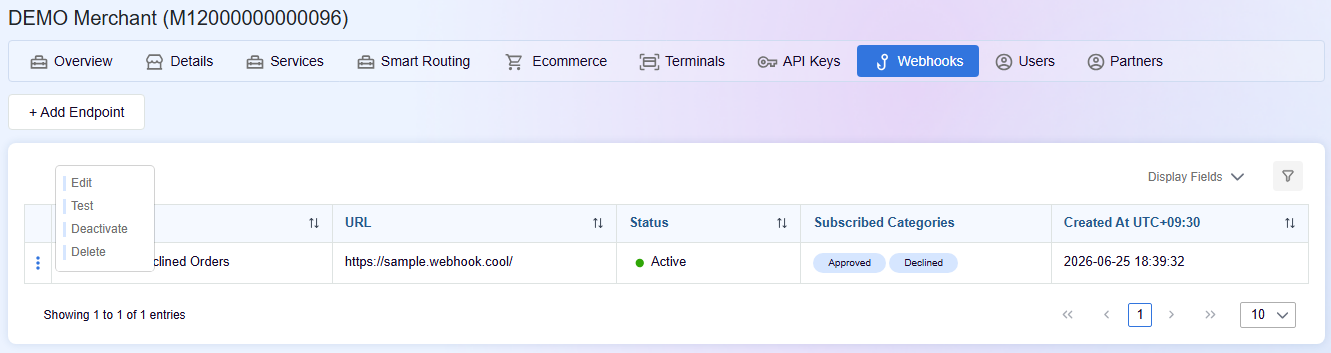
- Click the accordion menu
- Click on "Test"
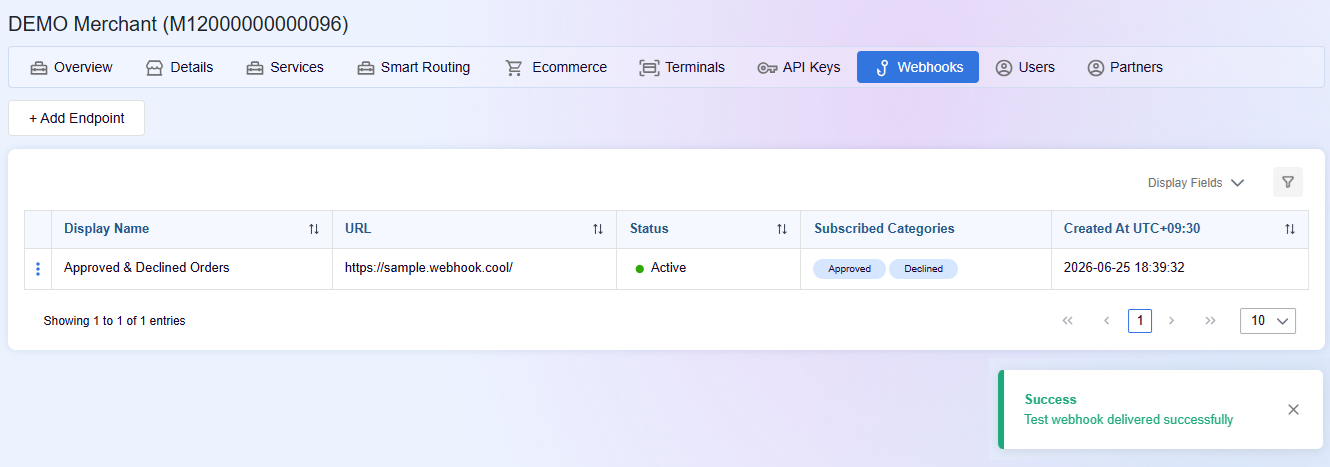
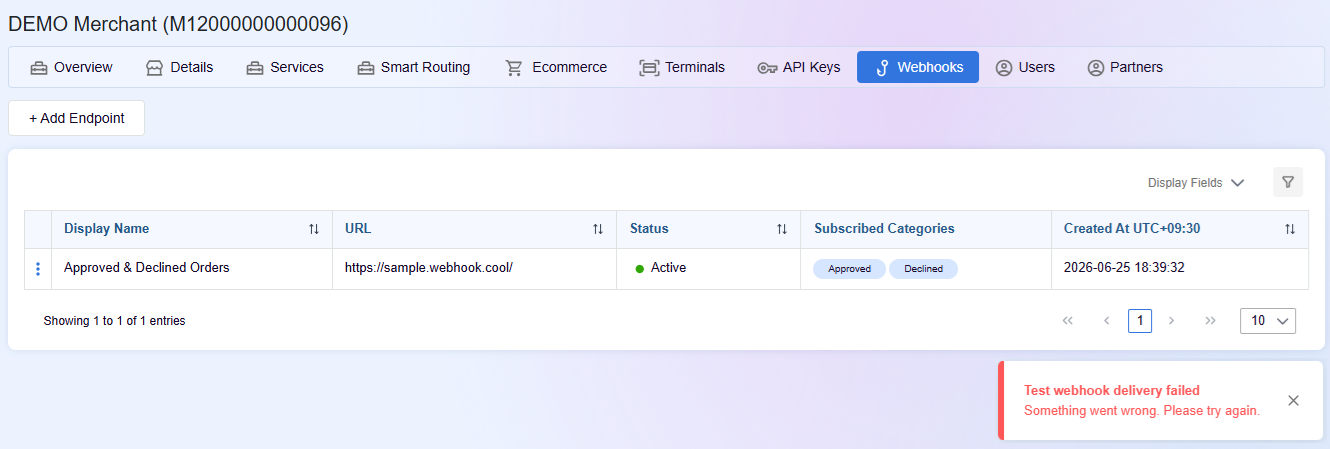
If successful, you will receive the webhook notification on your server. If failed, you will receive a failure toast message.
Successful:
Failure:


On this page
- Webhook Notifications